
House Hacking Project: Planter Box
Yard projects can run in scope from a simple weekend project to full blown construction that is months in the making. We will view two such projects this week: a raised planter bed and a complete backyard overhaul.
Simple weekend project: a raised planter bed. Sometimes it isn’t practical to dig out your material and replace it with fresh topsoil. This is the case in many areas in San Diego, where homes have been built in a cut or fill of granite. An easy hack is to build a planter box to fill with soil. Lets get started!

First, you will need a place to install the planter box. The dismal looking area in the picture above is our candidate, after not yielding any meaningful growth in four years despite plenty of water and good drainage. We sourced redwood planks to form our box, as they are very weather and termite resistant. A little pricy, but worth the spend seeing that these can last up to thirty years in our lovely weather.
We started with two 16′ 12″x 2″ planks. This was the difficult part, owing to the transportation issues using a standard 6′ truck bed. The upside is continuous sides, allowing for less hardware and joint failure. After careful measuring, the edges were beveled to 45 degree angles and joined from both sides with weather resistant deck screws. The completed box, in place with irrigation and drainage extended for the new floor height:

As mentioned above, all of the irrigation and drainage lines were extended to reach the new level of soil in the planter bed. The finished product after adding in 1 1/2 cubic yards of soil and planting various veggies and herbs:

With a little planning ahead of time, a project like the one above can be completed in one day. Our next project covers a complete backyard overhaul, from conception to finish. Demolition, digging, building and planting all played their parts in updating this backyard.
Total Backyard Renovation

The conception phase was a fun one, where we dreamed up creating a usable space from a very sloped and choppy backyard. It had a small raised deck, and a patio that was connected to a downstairs bedroom. Sloped grass didn’t provide much in an entertaining area either. We threw all of that out of the window, and envisioned a space that had three patio areas that were as large as practical, while allowing plenty of planter area for a lush yard.
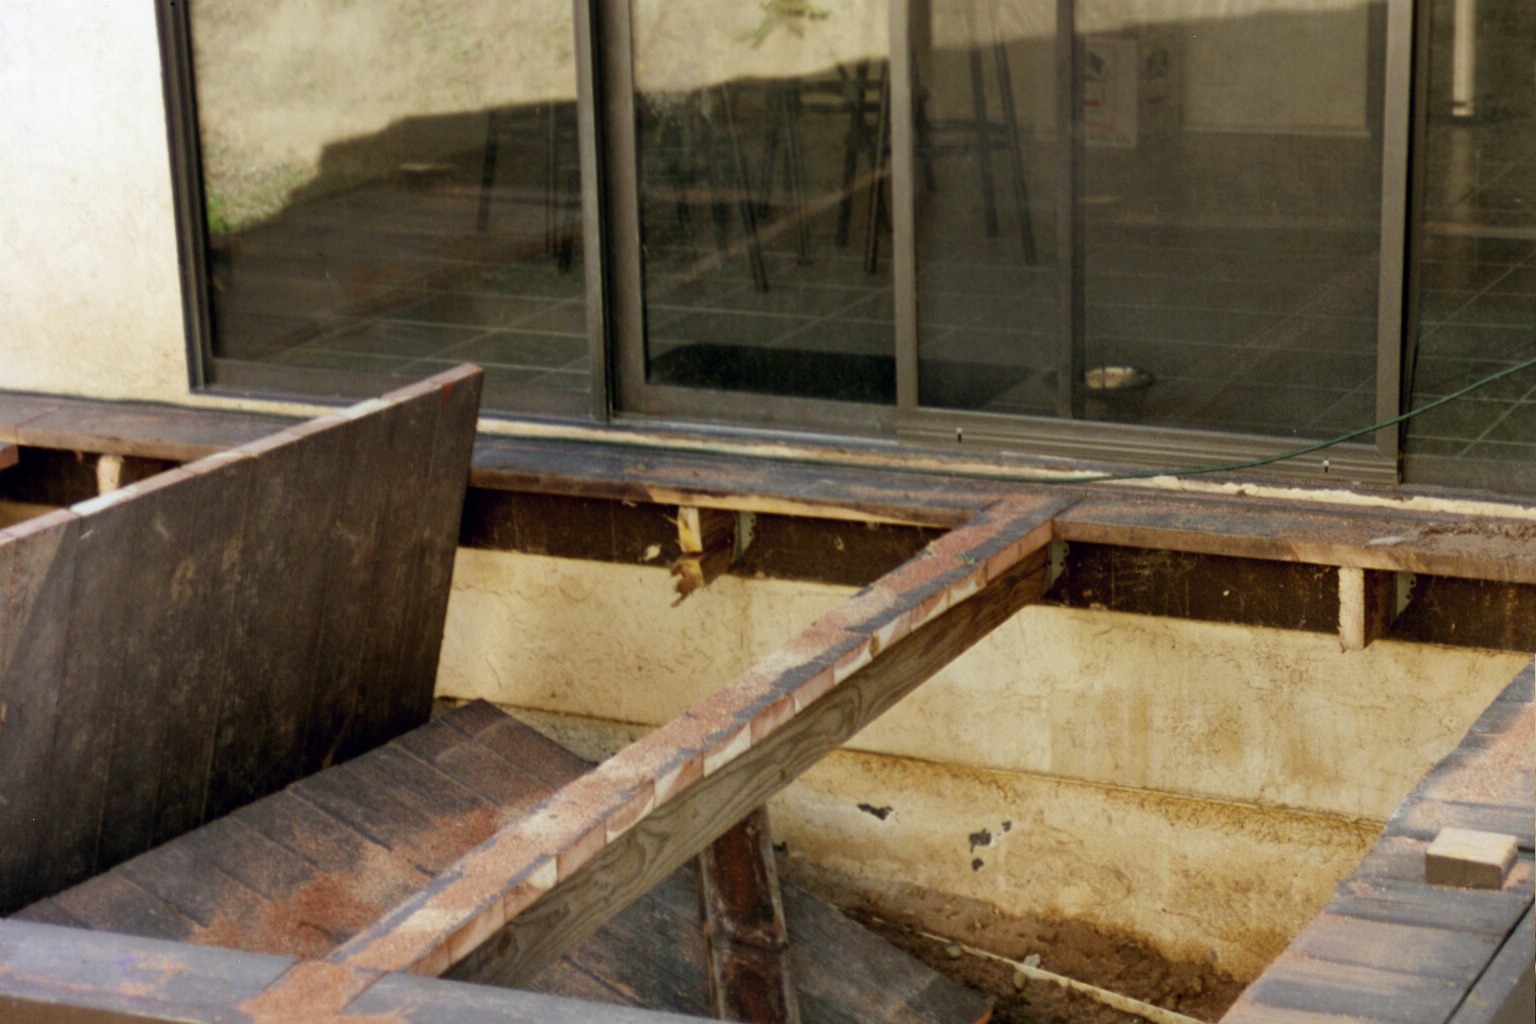
One of the first tasks was to demolish the raised deck attached to the house. With that out of the way, we could move blocks from a prior project to the side yard, where they would be installed and located out of the way of the major demolition and building.
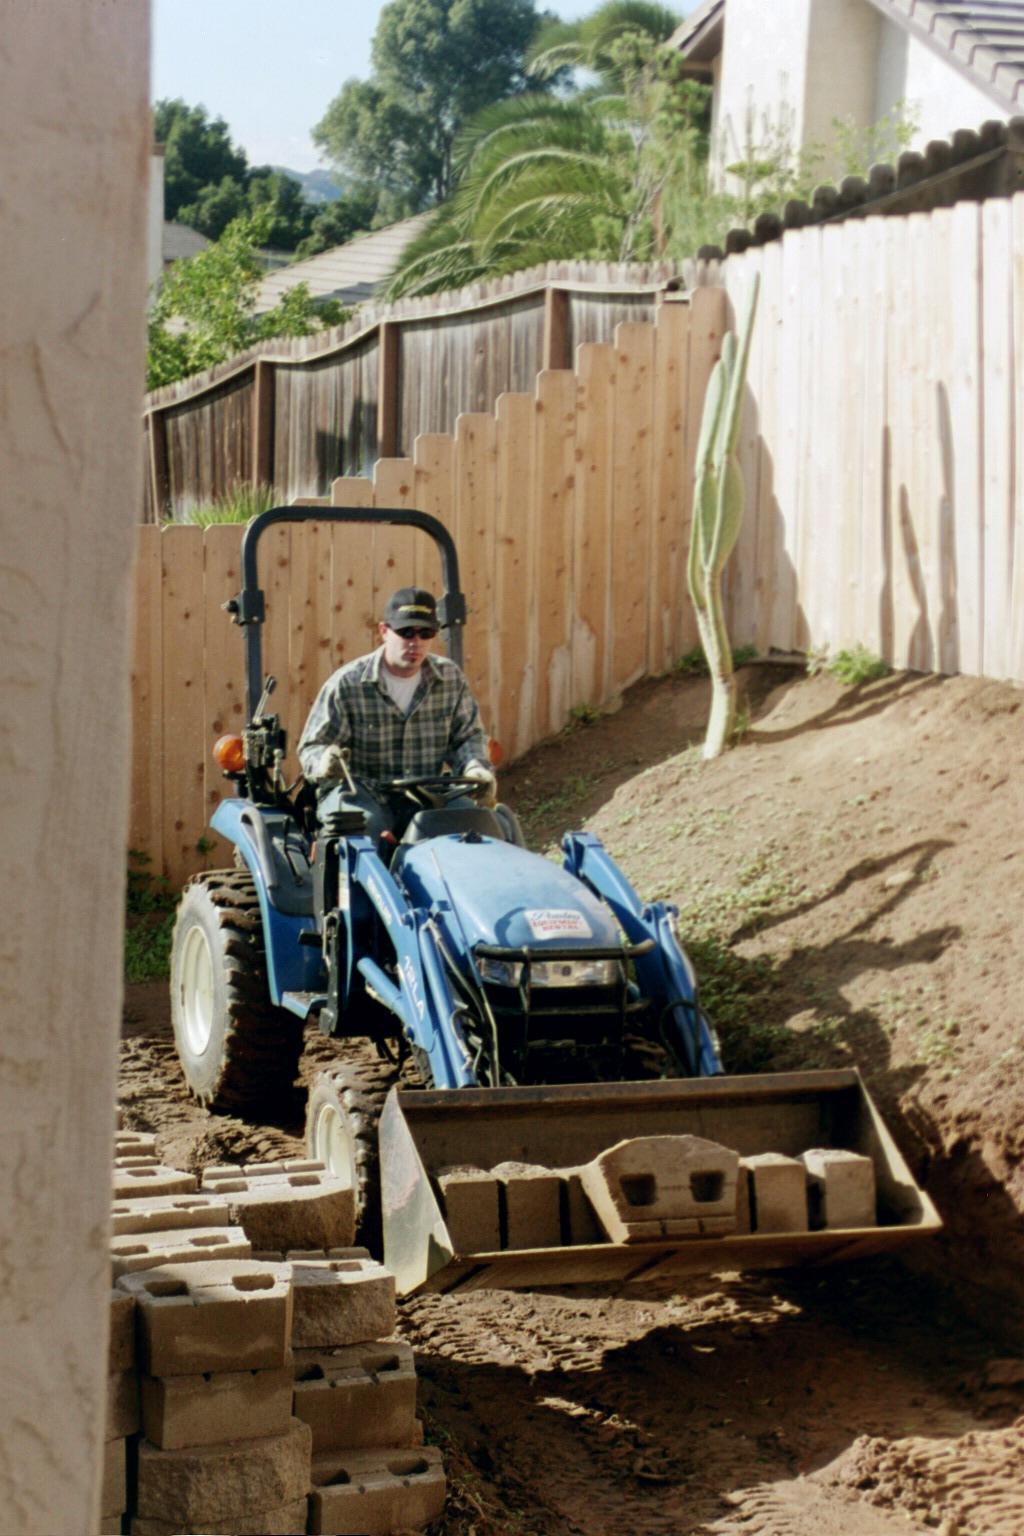
Blocks on the move! Equipment eases the task, especially when moving 10,000 lbs of concrete.

Demolition and first retaining wall dig. The scale of the project was apparent at this point. What on earth did we get ourselves into?

A retaining wall was to be installed, but first a footing dug to support it. This would frame the fill dirt phase, to start shaping up the new backyard living space. Two stairways were to join the three levels around the house. Drainage and irrigation lines were plot out as well.

Retaining walls in, soil being leveled and compacted for concrete.

The concrete pour was exciting to see. A culmination of so much prior work and effort.

The small finishing touches seemed to drag on, from stucco application and paint, to sprinkler placement. Then time to start the backbreaking work of planting an entire backyard. The reward is easy to see above, with plenty of room to enjoy the yard as well as room for landscape. A total overhaul!
Start to finish was nearly six months for construction, from initial demolition to signing off on the job. Landscaping was another few months of searching for the right plants. It was worth every penny and bit of effort!

We decided to leave the front yard for last during construction. We tackled that project in the following few months, xeriscaping with succulents and cactus. The rock river functioned as drainage, and worked well. Front to back, it was nearly a year of weekends. The total transformation was complete with a fresh coat of paint on the house.
If you have any questions, post a comment, send a text to (760) 814-1850 or email info@1850realty.com